A paid Apple Developer account ($99/year) removes every limitation below and lets Clout Uploader install Clout App automatically — no Xcode involved. Enroll →
This guide is the fallback path. The preferred install is via App Store Connect API — but if you're on a free Apple ID, that path isn't available, and this is how you get the device running.
What you'll need
| Requirement | Details |
|---|---|
| Mac | macOS 13 Ventura or newer |
| Xcode | Version 15 or newer — free from the App Store |
| Apple ID | Free or paid, with 2FA already enabled |
| iPhone | iOS 17 or newer, with a Lightning / USB-C cable |
| Free space on Mac | ~15 GB (Xcode + build artifacts) |
Windows users. Xcode only exists on macOS — manual signing on Windows is not possible without a Mac (or a macOS VM). Sideloadly, AltStore and similar tools will not work either: Clout App needs a signing flow those tools don't support. Free-tier installs require a Mac with Xcode.
Limits of a free Apple ID
| Limit | What it means in practice |
|---|---|
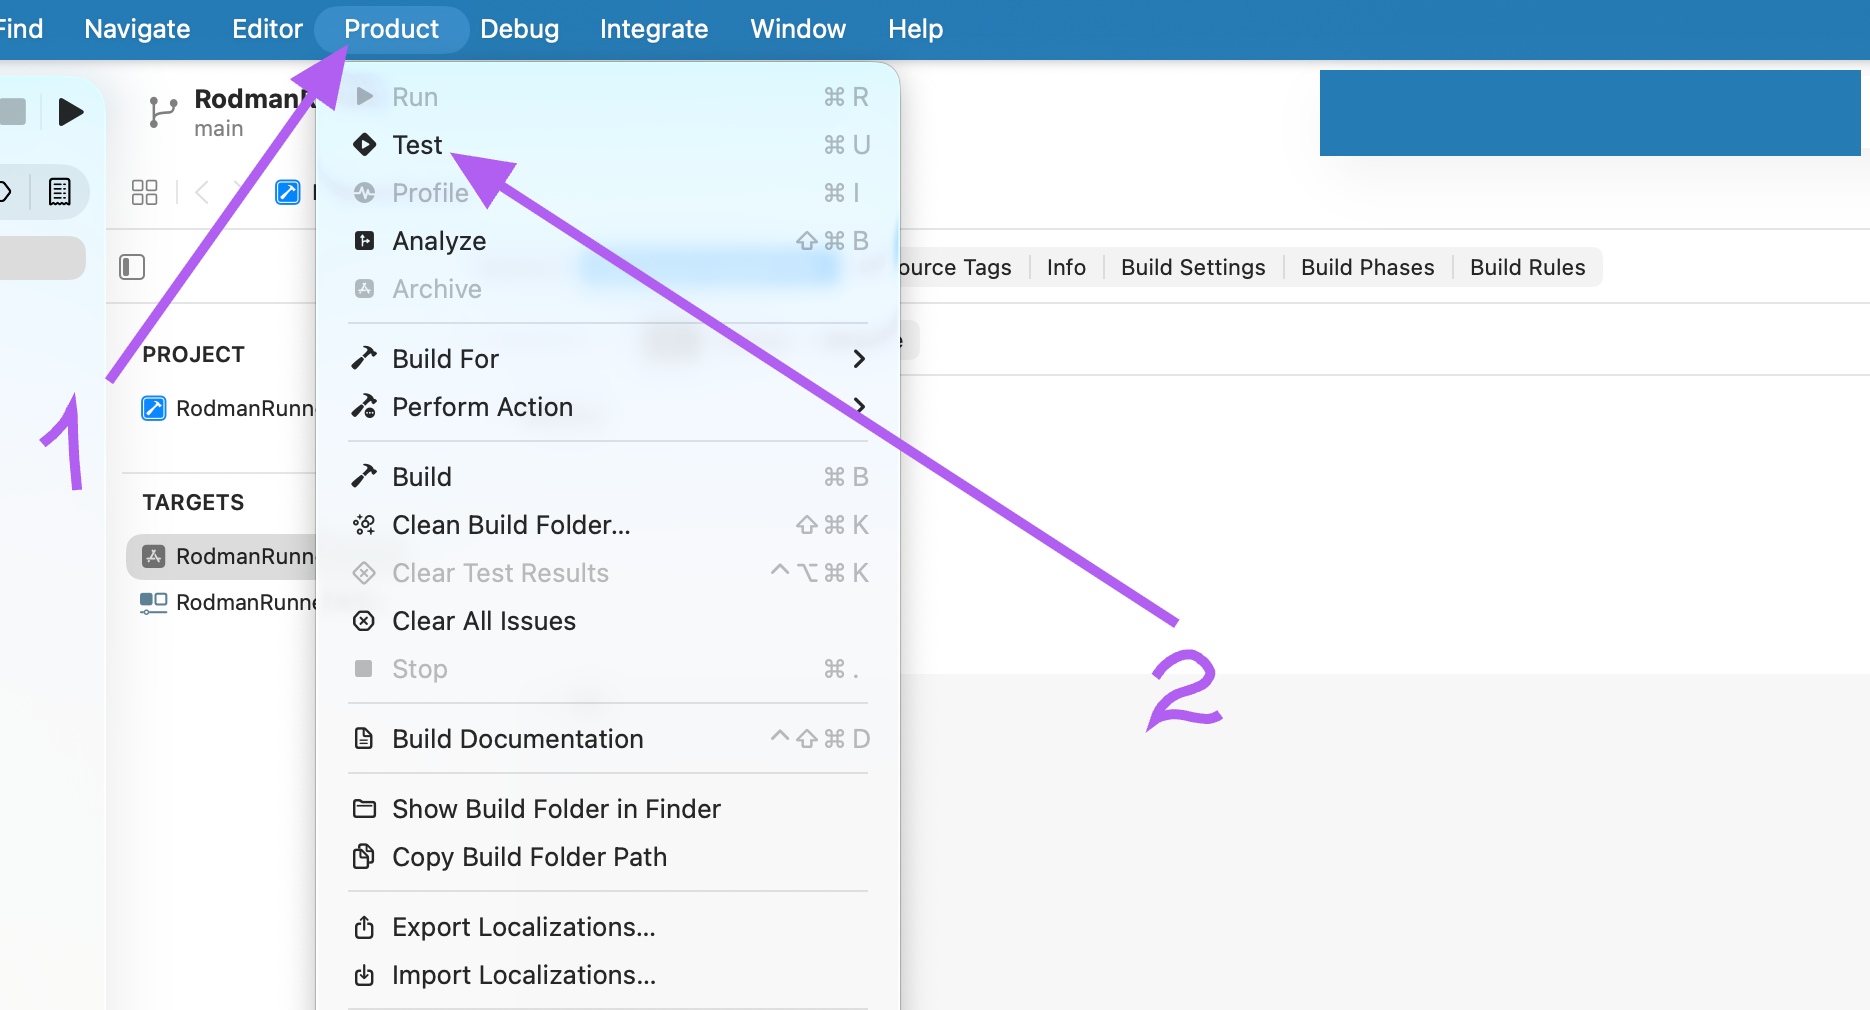
| Signing valid for 7 days | After 7 days Clout App stops launching. Fix: hit Product → Test in Xcode once a week — takes 1–2 minutes. |
| Max 3 apps per Apple ID per device | If you already have 3 sideloaded apps installed, remove one before installing Clout App. |
| One Apple ID = one install | If you run several iPhones, plan to use a different Apple ID per device — or just go paid. |
Install, step by step
Prep the iPhone
- On the iPhone, open Settings → Privacy & Security → Developer Mode and toggle it on.
- The iPhone will prompt to restart — confirm.
- After it reboots, unlock the phone and tap Turn On in the confirmation dialog.
Why: without Developer Mode, iOS refuses to launch any app signed with a development certificate.
Add your Apple ID to Xcode
- Open Xcode and go to Xcode → Settings → Accounts (
⌘,). - Click
+in the bottom-left → Apple ID → enter your Apple ID and password. - Once added, the right panel shows Personal Team with your name — that's the free signing team.
If 2FA is enabled, Apple will push a code to your trusted device — enter it.
Download the Clout App project
- In Clout Uploader open the Devices tab.
- Expand the Sign via Xcode Manually section.
- Click Download Xcode Project — a ZIP archive lands in your Downloads folder.
- Double-click to unzip.
Open the project in Xcode
- Inside the unzipped folder, find
RodmanRunner.xcodeproj. - Double-click it — Xcode loads the project.
- Wait until Xcode finishes indexing (the progress bar at the bottom finally goes idle).
Pick your signing team
CriticalThis is the most common place to slip — you need to do it for both targets in the project.
- In the left sidebar, click the blue RodmanRunner project icon at the very top of the tree.
- In the center pane, switch to the Signing & Capabilities tab.
- In the targets list, pick the first target:
- Make sure Automatically manage signing is on.
- In the Team dropdown, pick your Personal Team (Free).
- Now pick the second target and do exactly the same — same team.
If you see "Bundle ID is not available" or similar
Free Apple IDs can't reuse a bundle ID that's already taken by someone else. Fix:
- Switch to the General tab (next to Signing & Capabilities).
- In Bundle Identifier, change the value to something unique in the format
com.<randomteamid>.RodmanRunner— pick any short random string for<randomteamid>(e.g.com.k7m2p9.RodmanRunner). - Repeat for both targets — the second one's bundle ID must use the first one as a prefix (Xcode will warn you if it doesn't).
Plug in the iPhone
- Connect the iPhone to the Mac with a cable.
- On the iPhone, tap Trust on the "Trust This Computer?" prompt and enter the passcode. Sometimes iOS skips this dialog — if it doesn't appear at all, that's also fine, the device is already trusted by this Mac.
- In Xcode's top bar, click the device dropdown next to the scheme (it may currently say "Any iOS Device" or a simulator name).
- Under iOS Device, pick your iPhone.
If the iPhone doesn't show up — replug the cable, unlock the phone, or restart Xcode.
Build and install
- From the Xcode menu, pick Product → Test (or hit
⌘U). - Xcode starts building — typically 30–60 seconds.
- Dialogs may pop up on the iPhone during the build — leave the phone unlocked and don't unplug the cable.
- When the build is done, Xcode will try to start the test on the iPhone — it's normal that the test "fails" after a few seconds. What matters is that the app got installed.
⌘U).Trust the developer on the iPhone
The first time the app is installed, iOS doesn't trust the dev certificate — you have to allow it by hand.
- On the iPhone, open Settings → General → VPN & Device Management.
- Under Developer App, tap the row with your Apple ID.
- Tap Trust "<Apple ID>" and confirm.
- Find the RodmanRunner icon on the home screen and launch it once — it'll open on a blank white/black screen, that's expected.
- Close the app (swipe up).
The blank screen is normal. Clout App has no UI of its own — it's only a wrapper that Clout Uploader uses to control and automate TikTok on your phone. After this one-time tap-to-launch you won't need to open it again; Clout Uploader takes over from there.
Verify in Clout Uploader
- Go back to Clout Uploader, Devices tab.
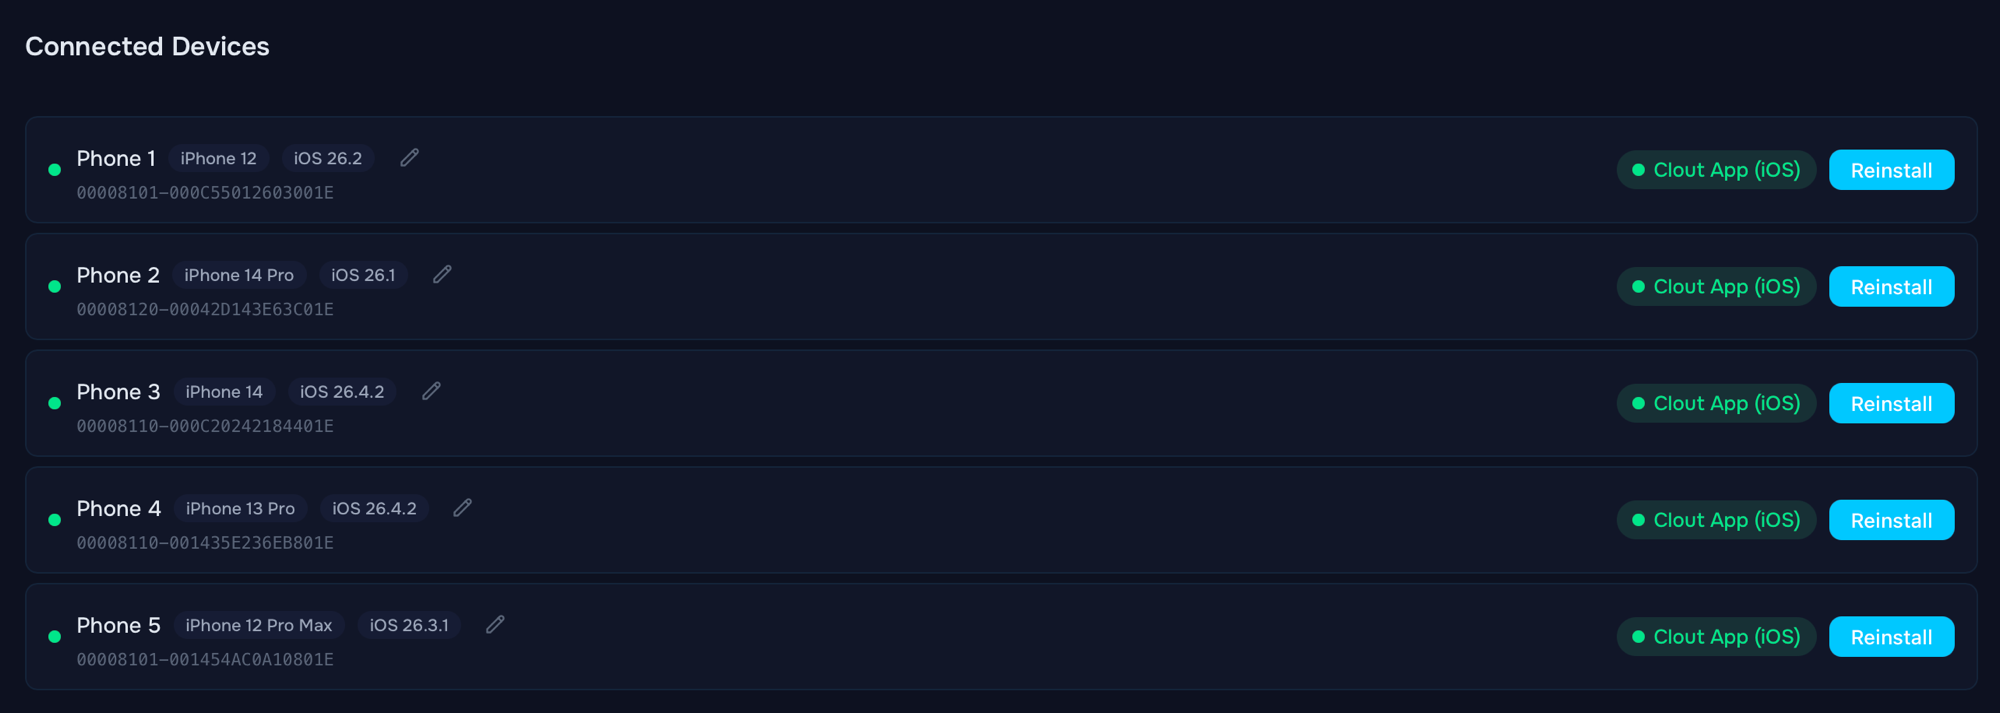
- Hit refresh — the device should now appear in the Connected Devices list with a green dot, the iPhone model and iOS version, and a green Clout App (iOS) badge on the right.
- Start a test thread — if it runs, the install is good.
What to do every 7 days
Signing on a free Apple ID is valid for exactly 7 days. When the certificate is about to expire, Clout App stops launching — Clout Uploader will show a Clout App connection error.
How to refresh it (1–2 minutes):
- Plug the iPhone into the Mac.
- Open the same
RodmanRunner.xcodeprojin Xcode. - Pick the iPhone in the device dropdown.
- Hit Product → Test (
⌘U).
Xcode resigns the app with a fresh certificate and it works for another 7 days.
Tired of the weekly refresh? A paid Apple Developer account ($99/year) extends signing to one year and lets Clout Uploader handle resigning automatically.
Common problems
| Symptom | Fix |
|---|---|
| "Could not launch RodmanRunner" / "Untrusted Developer" | Step 8 (Trust Developer) wasn't done. Settings → General → VPN & Device Management → trust the developer. |
| "Failed to register bundle identifier" | The bundle ID is taken. Go back to step 5 and pick a unique Bundle Identifier. |
| "Maximum App ID limit reached" | Free Apple IDs are capped at 10 unique App IDs every 7 days. Either wait it out, use a different Apple ID, or move to a paid account. |
| Xcode doesn't see the iPhone | Unlock the phone and re-confirm "Trust This Computer". Try a different USB cable — needs to be a data cable, not charge-only. As a last resort, restart Xcode and the Mac. |
| "This device has reached the maximum number of installed apps" | The iPhone already has 3 apps signed with your free Apple ID. Remove one and try again. |
| Build is slow or seems stuck | A typical build is 30–60 seconds; on a slow Mac it can stretch to a few minutes. If it's been longer than that, quit Xcode, delete ~/Library/Developer/Xcode/DerivedData, and try again. |
A few more things
- Security. Clout App (iOS) is a local helper that drives TikTok on your iPhone for Clout Uploader. It doesn't send data anywhere — it only talks to Clout Uploader on your own machine.
- Several iPhones. Repeat steps 6–8 for each device without re-doing the project setup. One Apple ID covers up to 3 devices.
- Switching Apple ID. If you change Apple ID later, hit Switch developer account in the Devices section of Clout Uploader — that clears the old signing cache.
Related guides
- Prepare your devices — the one-time host and iPhone setup that should be done first.
- Install via App Store Connect API — the preferred install flow once you move off the free Apple ID.
- Upload mode — running your first publishing session once the device is ready.